Reviewing Payroll data in Xero
Xero payroll is a powerful tool to minimise the time it takes to manage payments to your team as well as superannuation. To get the most out of Xero it needs to be correctly set up.
When Jet converts clients from a different accounting system, we set up the payroll with the settings from the old system. Everything in the old payroll comes across where possible. There is not always a direct match – so check everything. If you did not use payroll in the old system, this blog should help you set up payroll quickly.
- Check the action checklist and make sure you correct missing data we have identified for you (tax numbers, bank accounts, superannuation accounts etc.)
- All active and inactive employees come across.
- All pay items – some non Xero-standard items are converted to “Other”
- Pay calendars – even when the previous system does support them (we check pay frequency)
- New features, such as the MyXero employee self service are not set up.
Reviewing payroll is essential upfront. Here is how to get the most out of it.
- 1. Review your Payroll settings
- 2. Set up Pay Items
- 3. Establish Payroll Calendars
- 4. Check Superannuation details
- 5. Review your Employees and add new Employees
- 6. Review Pay templates
- 7. More information
1. Review your Payroll settings
- Go to the settings tab
- Select general settings
- Select payroll settings
In the first tab, review your bank account and to which accounts your payroll items are being coded. If you are using tracking categories select the appropriate employee group and timesheet category.
We sometimes find that there is an expense account set up for each employee or that each payment type is booked to a different account. This often clutters a Chart of Accounts and makes reporting less useful. There are other reports that can show the costs by employee if payroll tracking is implemented.
Make sure that the bank account selected is the one that you actually pay your employees from.
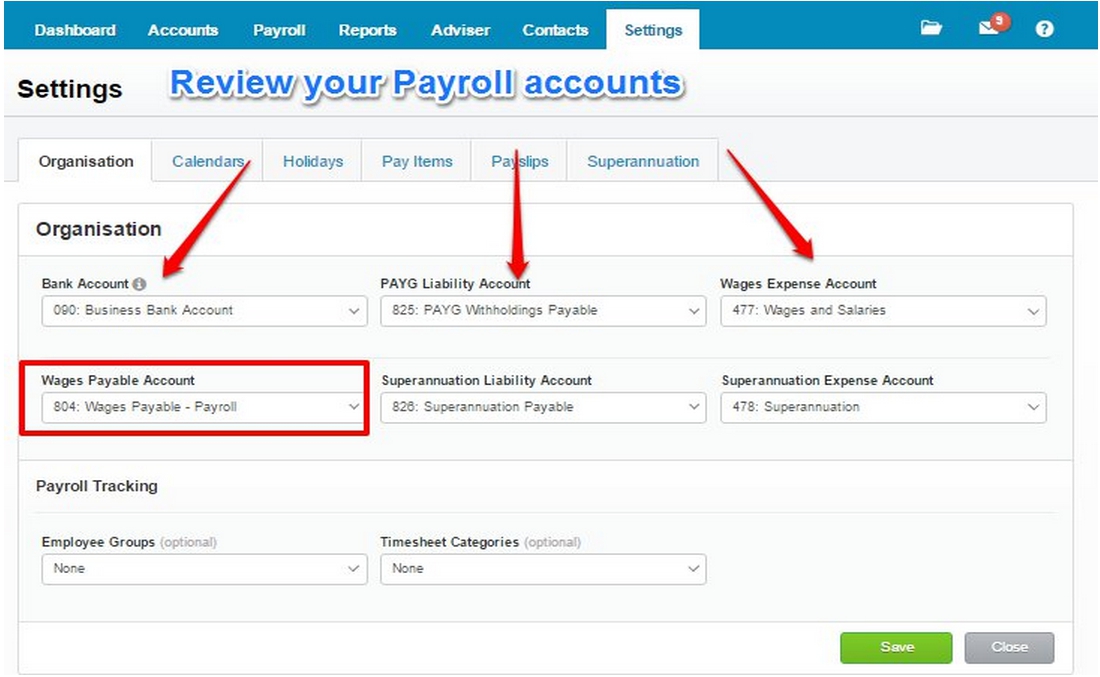
In the payslip tab add your logo and select the details you want to show on the payslips.
![]()
2. Set up Pay Items
It is best to add as few pay items as possible while complying with any awards you might fall under.
We often find multiple pay items that all have the same settings. To tidy things up they should all be combined into one.
There is no need to differentiate between hourly pay items or salaried pay items. You can actually use the same pay item and select how you pay an employee when you choose the pay item in the pay template (see “6. Review Pay Templates” below).
In the pay items tab review the setup of your payroll items including allowances and deductions. Here you can add new items or edit items you already have.
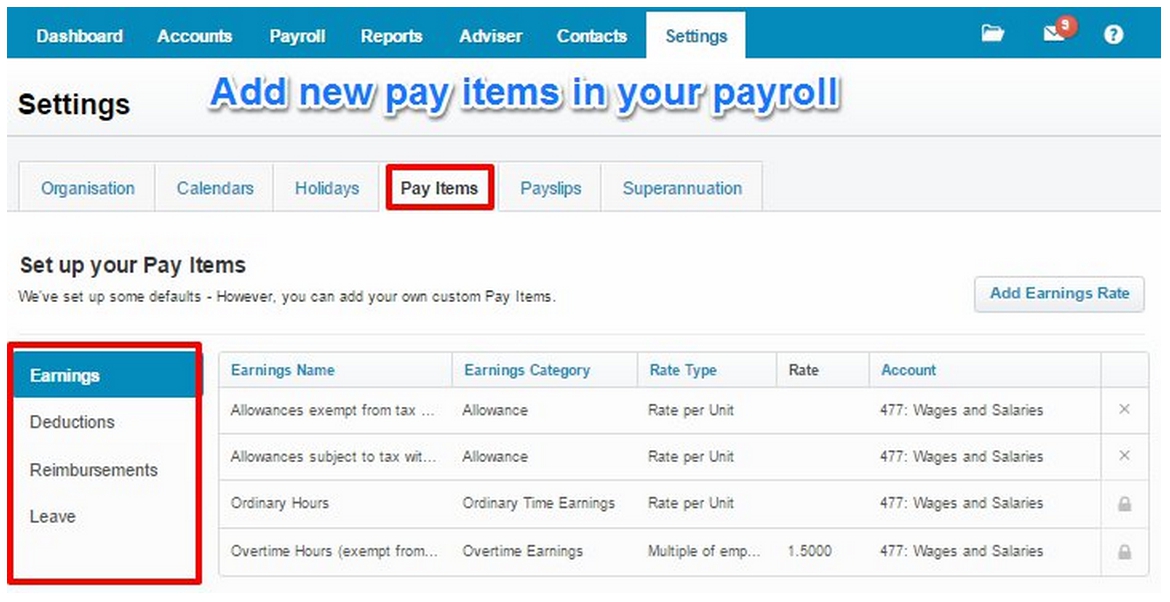
When we convert clients from a different accounting system, opening balances are added to show what has been paid to employees through the old accounting system. It allows you to create correct PAYG Payment Summaries from Xero and makes sure that the payslips show the correct YTD figures.
In these opening balances we also need to include Leave pay, it is for that reason we create leave pay items. After conversion you will no longer need to use these ‘leave pay items’.
3. Establish Payroll Calendars
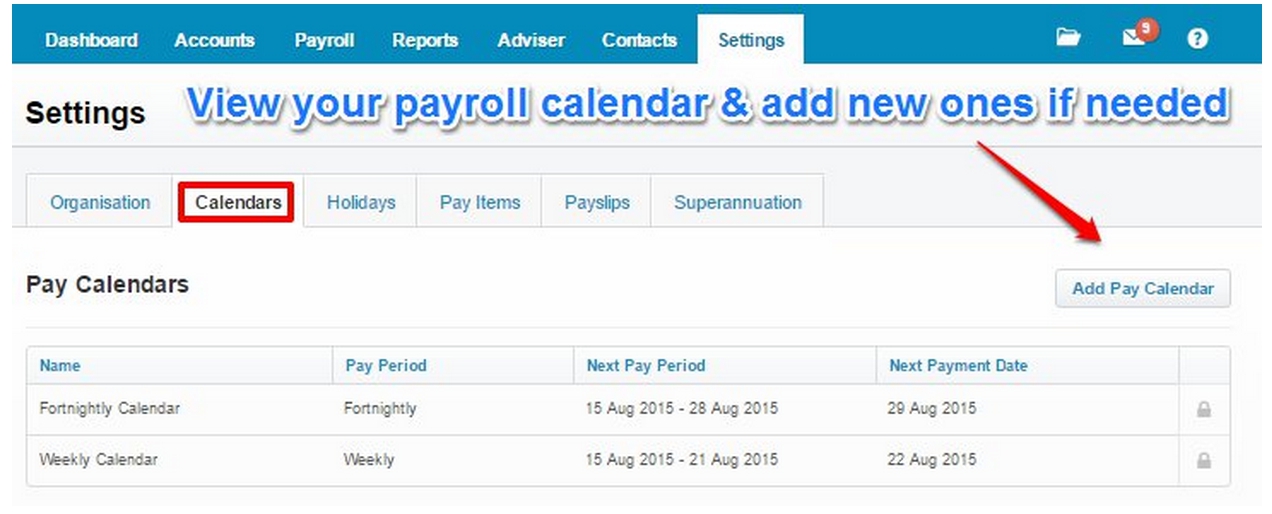
The payroll calendar defines how often your employees are paid and for which timeframes. To save time it is best if you can pay all your employees in the same frequency and on the same day. Where that is not possible you can add multiple payroll calendars.
In the calendar tab you can view your payroll calendars. If you need to add a new calendar make sure that the start date is the first day in the pay cycle and the payment date is when the payment is done to your employees.
Each employee has to be linked to a calendar. If you need to change calendar on an employee go to the employee and add the changes in their setup.
4. Check Superannuation details
Xero forces you to enter super details accurately. Xero Premium subscriptions includes an automated super payment option where it just takes a click of a button for Xero to report to all super funds for your employees. For this to work, the super settings are essential.
Accurate super settings in Xero will also simplify things if you manage the super reporting yourself.
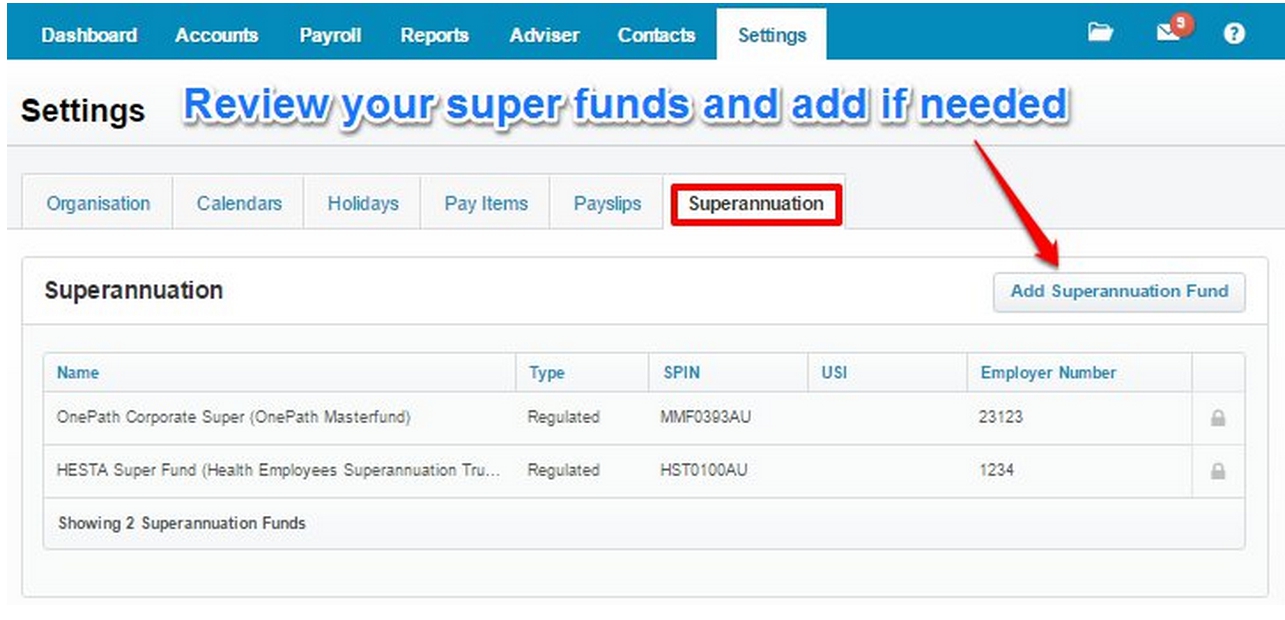
Xero includes a list of all regulated Australian super funds. You can often find them by name, but if unsure you can use the SPIN/USI number. Self managed funds can be entered with all bank details and reporting is handled for them as well.
In the superannuation tab you will find all the super funds that you have set-up for your employees. You can add new funds, both self managed and regulated super funds. If you need to change any super fund details for an employee first add the super fund in this tab and then go to the employee to edit their setup.
5. Review your Employees and add new Employees
- Go to the payroll tab
- Select employees
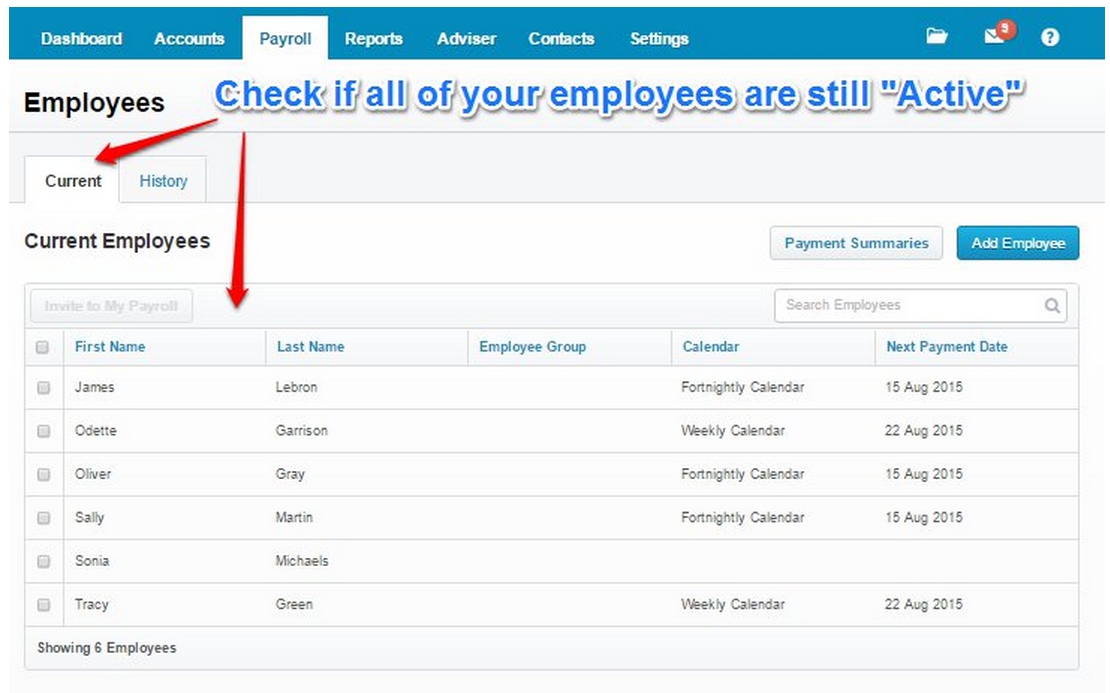
In the first tab please view all your employees by status (you can add a new employee here). It is very important to review the setup of your employees, this gives you the chance to add any missing details for any employee. Select your first active employee and go through all the tabs in the settings.
With conversions we often find employees with no termination date even though they no longer being paid. That means they will show up in this list and you need to enter the termination date to remove them. This will clean up your employee list and payruns.
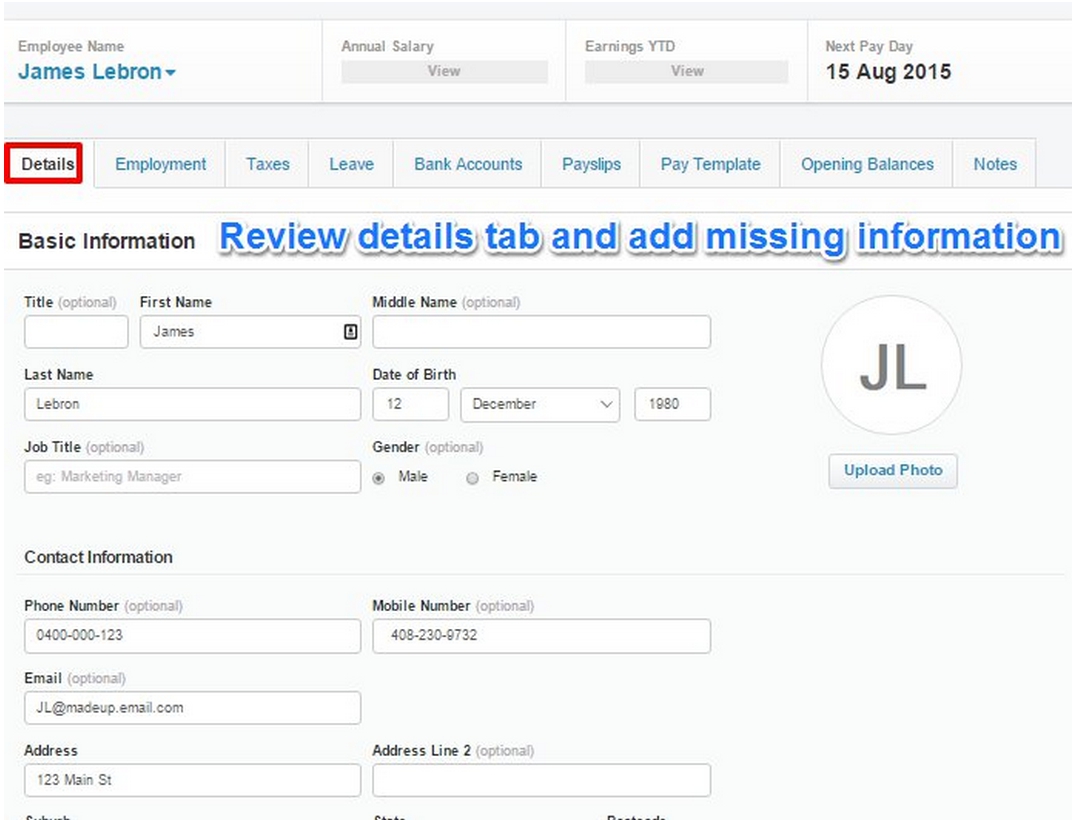
Review the details for each employee. It is important to add a contact email address so you can automatically send payslips to them when the payrun has been created. It is also useful to update other address details.
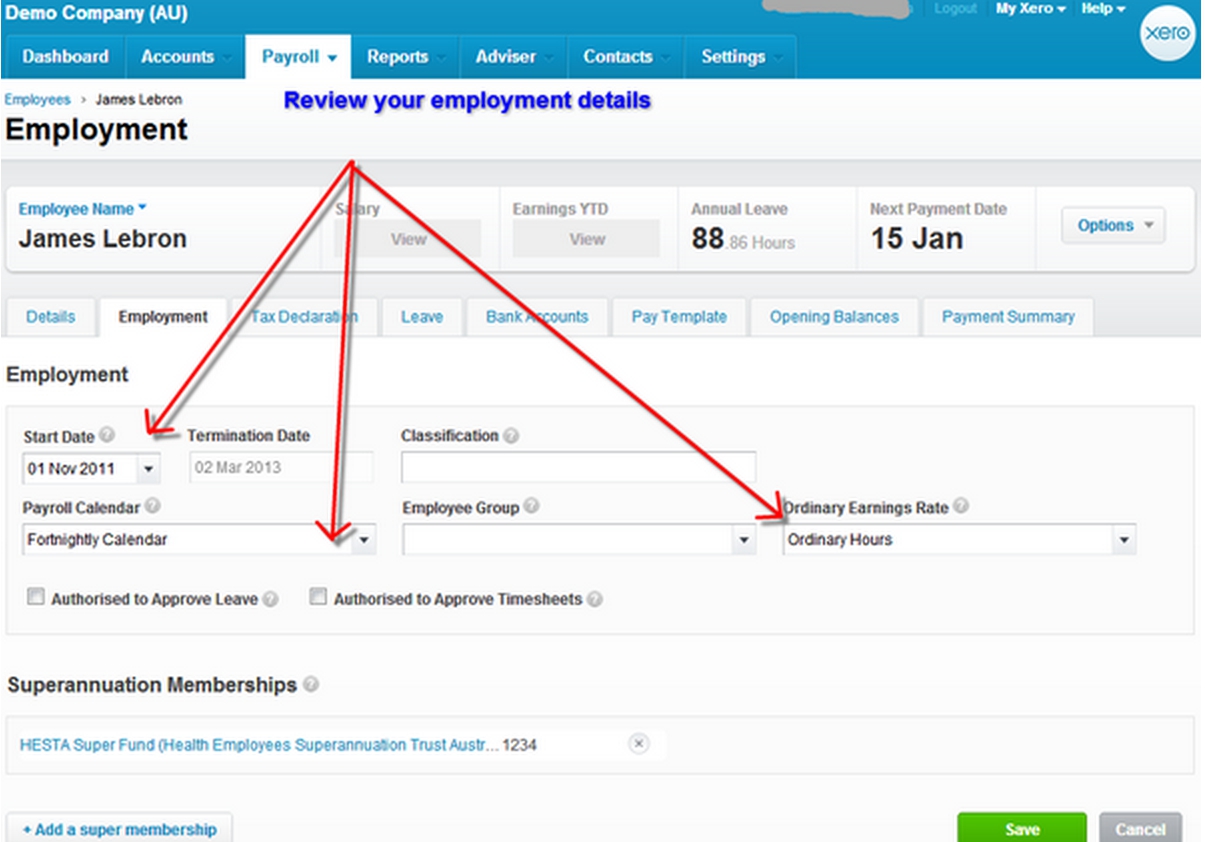
In the employment tab review the details and make sure that your employee has:
- A start date
- Payroll calendar
- A superannuation membership and
- An ordinary earnings rate.
You can add other details as appropriate.
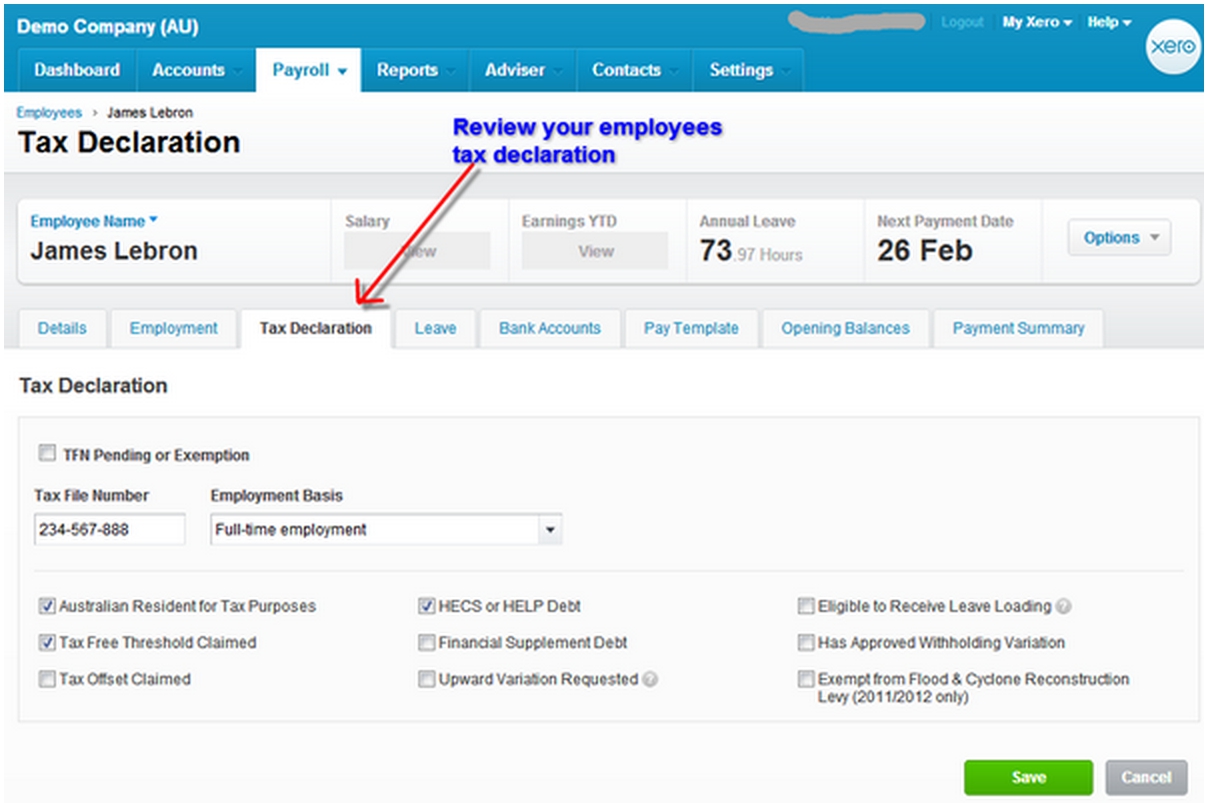
The tax declaration tab is important for your employees setup and how PAYG etc is calculated. It is best to compare that to the original TFN declaration that you have on file for each employee.
Add any missing details ASAP and make sure the relevant boxes are ticked. Be very careful when entering information as getting this wrong might result in you having to backpay taxes on behalf of your employee.
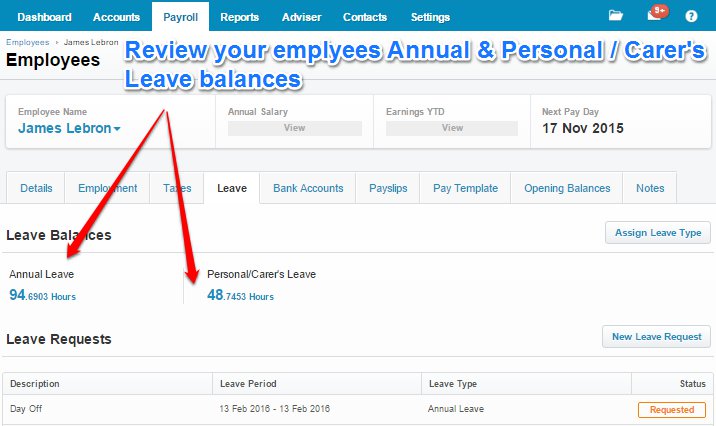
In the leave tab you can view your employee’s leave balances and add leave applications. In the Xero help centre you can read more about how the leave tab works and how to give your employees access to Xero.
Review the bank account setup for each employee. Make sure the bank account details are entered and correct. Then you will be able to create an ABA file and upload to your bank, rather than having to enter the employee payments manually into your bank portal.
If you still pay an employee by cheque, kindly ask them to join the 21st century.

6. Review Pay Templates
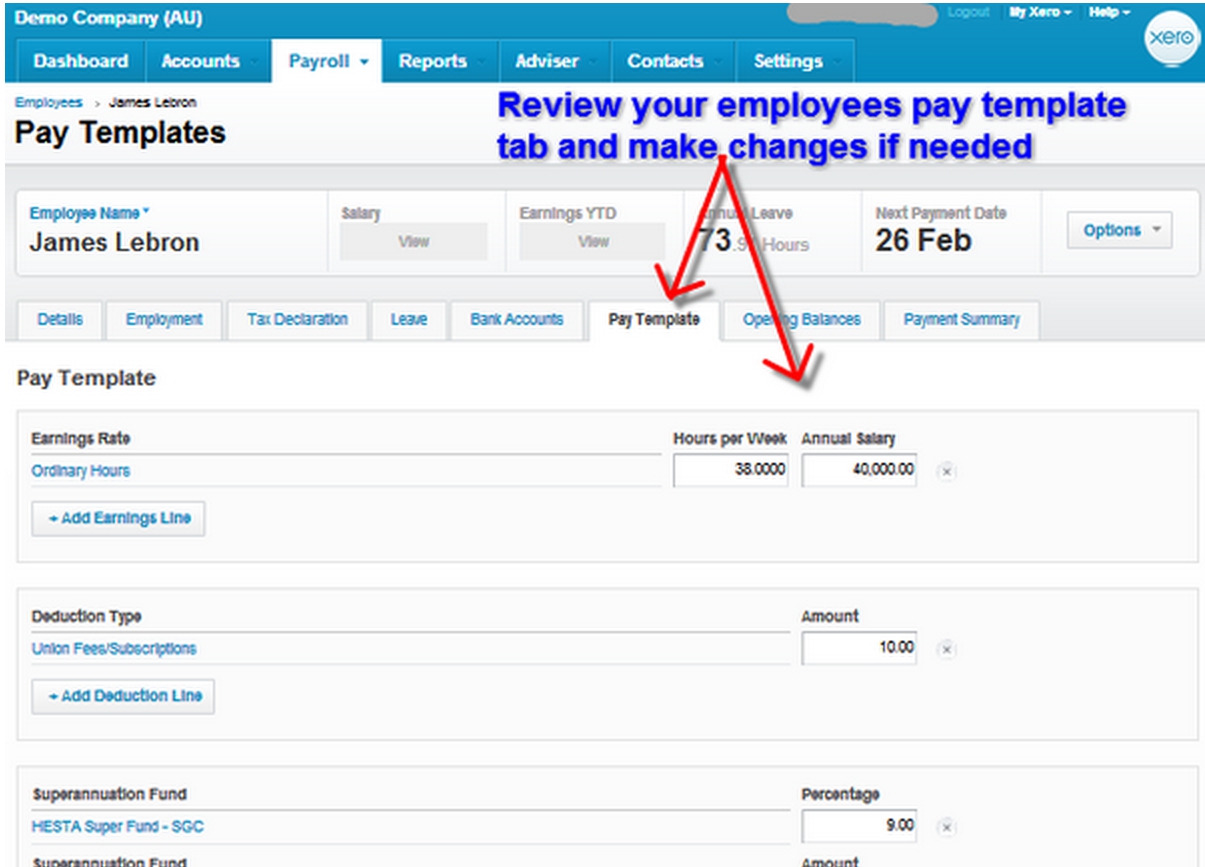
The pay template is the biggest time saver of all. You want to set it up to minimise the work during payruns. All pay items that you might need to use should be in here.
If there are standard hours, or standard amounts for allowances you should add them. Whatever is in here will be used to pre-fill your payrun. When you create the payrun you are then completely free to change anything, but obviously you want to minimise the need for that.
When you add a pay item, you can select whether you pay via an hourly rate or an annual salary. Review your employees’ pay templates, add or edit any items that you want to appear automatically for your employee when creating a pay run.
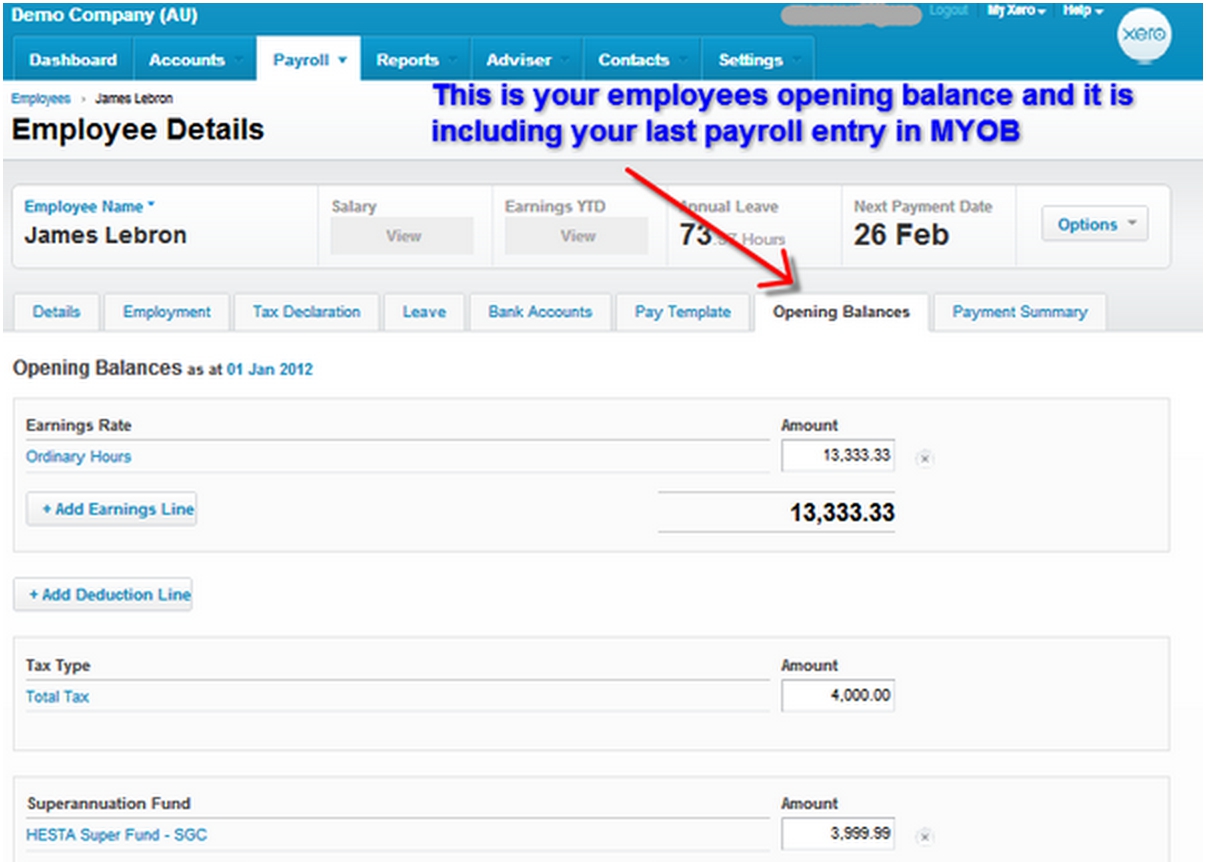
The opening balance tab reflects what has been paid from the beginning of your financial year to the last pay run created in the old accounting software. It is here that we use the Leave pay items.
Please note which date the opening balances are for. The first payrun in Xero should be set for the period immediately after that date.
7. More information
If you would like us to help you with your payrun book some Xero coaching with one of our certified consultants.
We also have information on how to do a payrun on our website, and recommend that you sign up for the free Xero training for payroll.
Enjoy payroll in Xero!
Zowie Hondow