Customise your MYOB Chart of Accounts into Xero
Using a standard Chart of Accounts across all your Xero orgs works nicely to streamline your report packs and provide ready comparisons. However getting there can be a pile of work if you import the Chart of Accounts as it is in MYOB and tailor later in Xero.
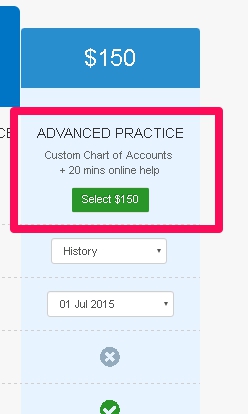
The good news is that our latest premium package – ADVANCED PRACTICE – adds an extra service to the conversion so that you can choose how the Chart of Accounts will appear in Xero. The full MYOB file history will then present in Xero as though it had been run through this new Chart of Accounts.
The ADVANCED PRACTICE package is in Beta mode so there may be some areas where User Experience could be better. However it is currently available via our website and we’d love to hear from you if you give it a go.
Note, this premium service is available for Xero Partners only.
Where do I select this service?
Upload your MYOB file via our home page. Within a few hours you will receive an email asking you to select your conversion service.
Here you can choose the ADVANCED PRACTICE package.
 Once you have selected ADVANCED PRACTICE we ask for information on how the bank accounts should be treated in Xero and to map any custom tax codes that may exist in the MYOB file.
After a small delay you receive another email asking you to go to the Chart of Accounts mapping screen.
How do I perform the Chart of Accounts Mapping step?
1. Create the .csv file that contains your desired Chart of Accounts. The easiest way to do this is to export a .csv file from an existing Xero org which you can then modify.
2. Click on the link in the email you were sent from us which will take you to your conversion status page to perform the mapping.
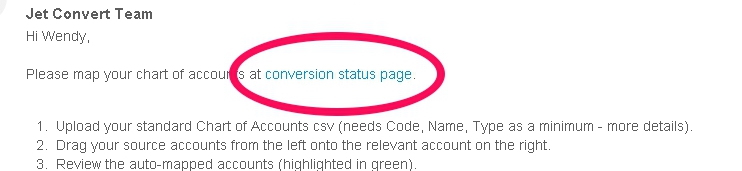
3. Upload the .csv file you created.

4. Use this screen to map the Chart of Accounts as you would like them in Xero.
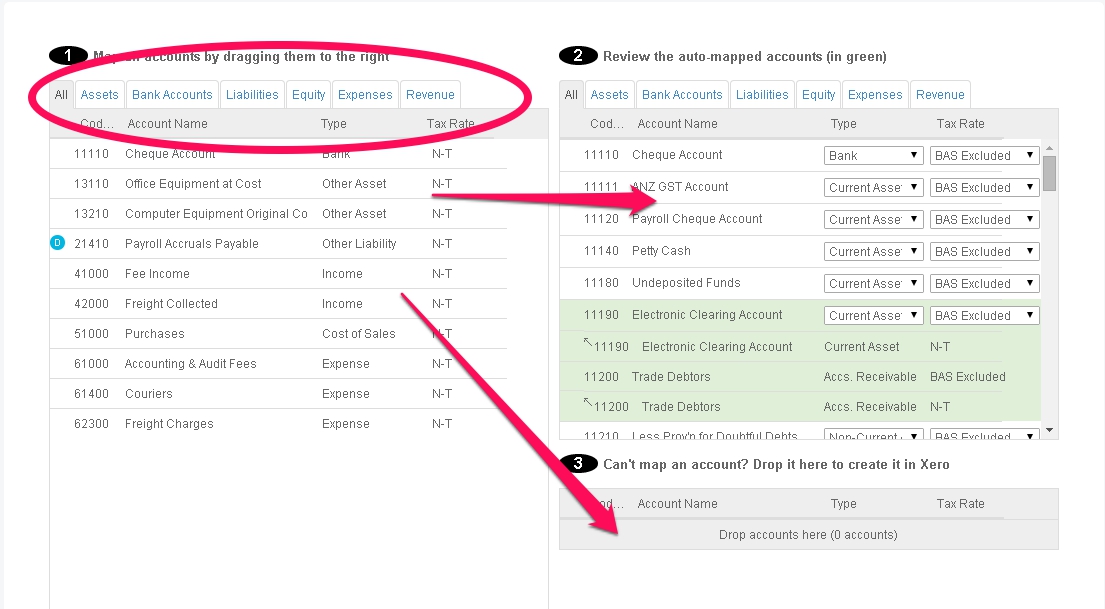
a) Drag the MYOB source Accounts from the left hand column into the Xero destination accounts on the right hand side.
b) You can add any accounts that cannot be mapped with a simple drag and drop. They will be added in Xero.
c) The accounts highlighted in green have been automapped and you should do a quick check of these.
d) You can also change account type and tax rate from this screen.
Tip: Use the Tabs at the top to filter the data, making it easier to select the appropriate account to map to.
Tip: You can multi-select accounts for mapping by using the “Shift” or “Ctrl” keys when clicking.
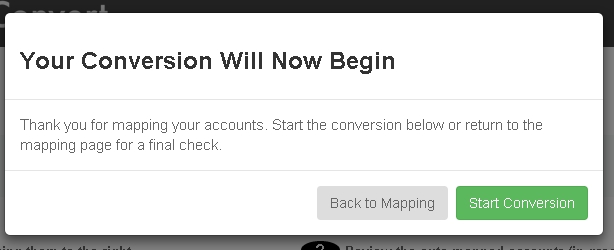
5. Click the green ‘Start Conversion’ button and you are on the way. It takes up to 3 business days to complete the conversion from here.
Making it easier for you
Intelligent mapping
The first time you perform Chart of Account mapping it may take some time. However we do use artificial intelligence in our auto-mapping function that helps to reduce the amount of accounts that need to be mapped:
- we only select accounts with transactions or balances (all others are not mapped as they have not been used)
- we auto-map when the names are similar, these are highlighted in green.
Action Checklist
The trial balance comparison in the post conversion Action Checklist shows exactly how your accounts have been mapped from old to new, an easy reference guide for your clients.
![]()

Go and get your MYOB files in order!
So if you want to have the Xero orgs lined up with matching Chart of Accounts start sending through your MYOB files now. Once you have done the first one the rest follow easily!
We’d love your feedback on this new service, please leave a comment below with your thoughts.
Wendy