Converting to Xero – blow by blow!
Updated: March 2016
In my role as Business Relationship Manager I get a lot of enquiries from Xero Partners wanting to understand the conversion process.
If you have never used us before, the unknown may be daunting – but in reality it is all very straightforward!
1. Prepare the source file
There is some ‘tidy-up’ work that we recommend you do in the file prior to conversion. But because it is a lot easier to perform functions such as reconciliation in Xero we suggest that you leave unreconciled items unreconciled and open invoices open, as long as these transactions are after the conversion date*.
* The conversion date is the start date from which we bring across historical data from the source file. Transactions end where the file ends.
More information on preparing your file for conversion can be found on our Frequently Asked Questions (FAQ) page.
2. Send your file to us
Perform a backup to compress the file and reduce the time it takes to upload.
To get started go to our website and click the green ‘Load your file’ button.

Please allow some time for the upload to occur, especially if your internet speed is slow. Usually you only need to wait around 5 – 10 minutes though it can take up to 30 minutes depending on your broadband and file size. If you navigate away from the screen prior to the upload finishing you will need to start over again. So perhaps this is a good time to go get a cup of coffee while our server does its thing!
You then fill in contact information for yourself, and the e-mail address to which we should send the Xero subscription once the new Xero org has been created.
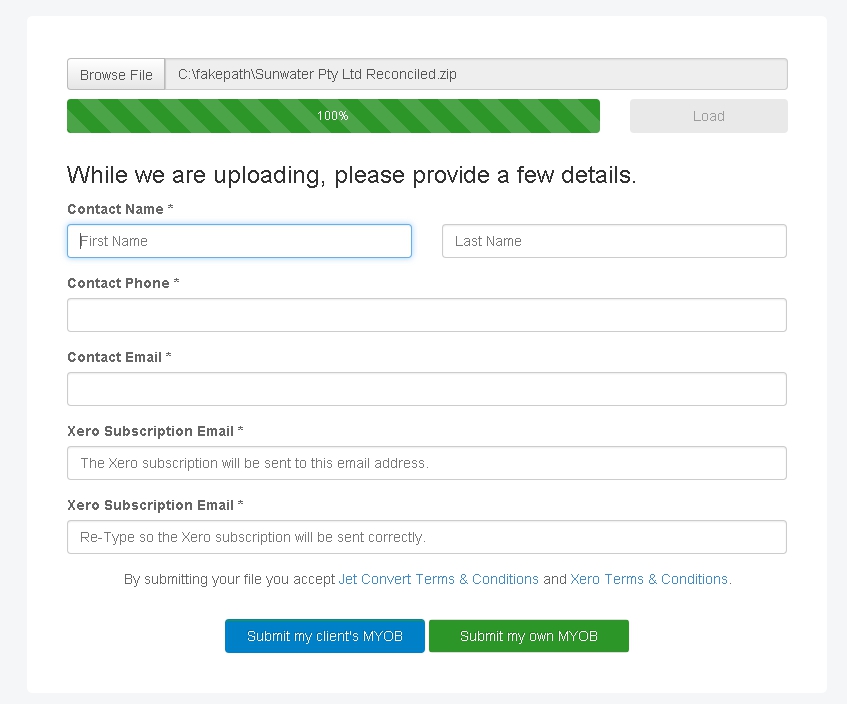
If your file is Reckon you will also be asked your GST accounting basis and amount of financial history you would like to receive.
Click the blue ‘Submit my client’s MYOB’ if you are a Xero adviser. Click the green ‘Submit my own MYOB’ if you are a business.
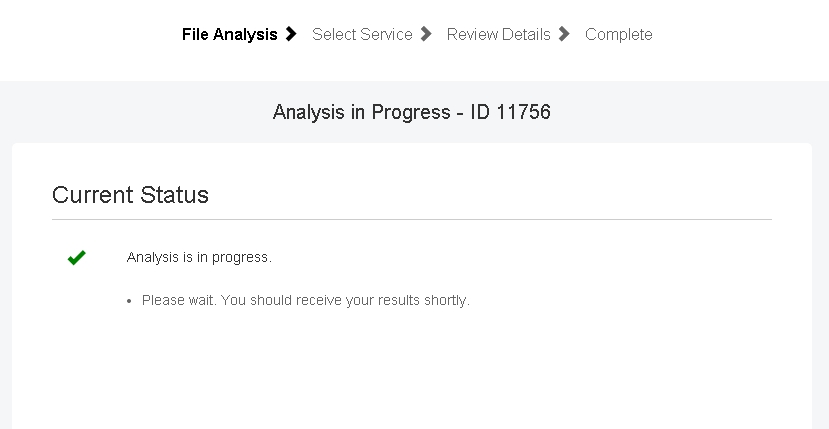
As soon as your file has been received the software starts reading the information. You will receive an email to confirm that we have your file and link to your own personal status page which you can visit at any time to see where your conversion is at.
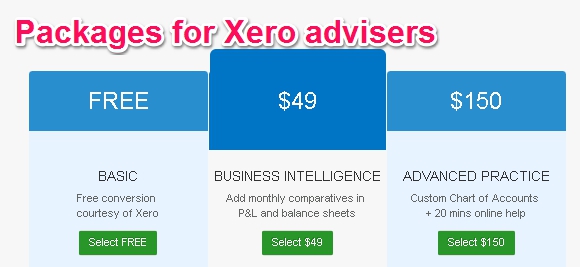
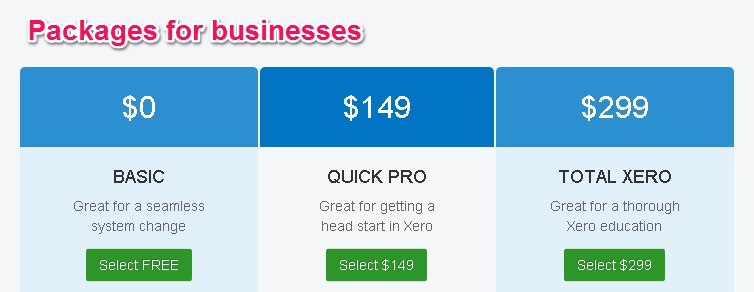
3. Select your service (MYOB files only)
When the data in your MYOB file has been analysed you will receive an email that asks you to go to your status page to select your conversion service. This may just be a matter of seconds or make take a few hours, it depends on the data in your MYOB file.
Select the service that best meets your needs. You can also change the conversion date to one that is more recent if you do not need so much history.
 Once you have clicked one of the green buttons to select your service you then go to another page to advise us how you want the MYOB bank accounts to be treated in Xero.
In your MYOB file, bank accounts will be set as either bank, credit card, asset or liability. At this step you can review and, if necessary, change bank account types prior to conversion.
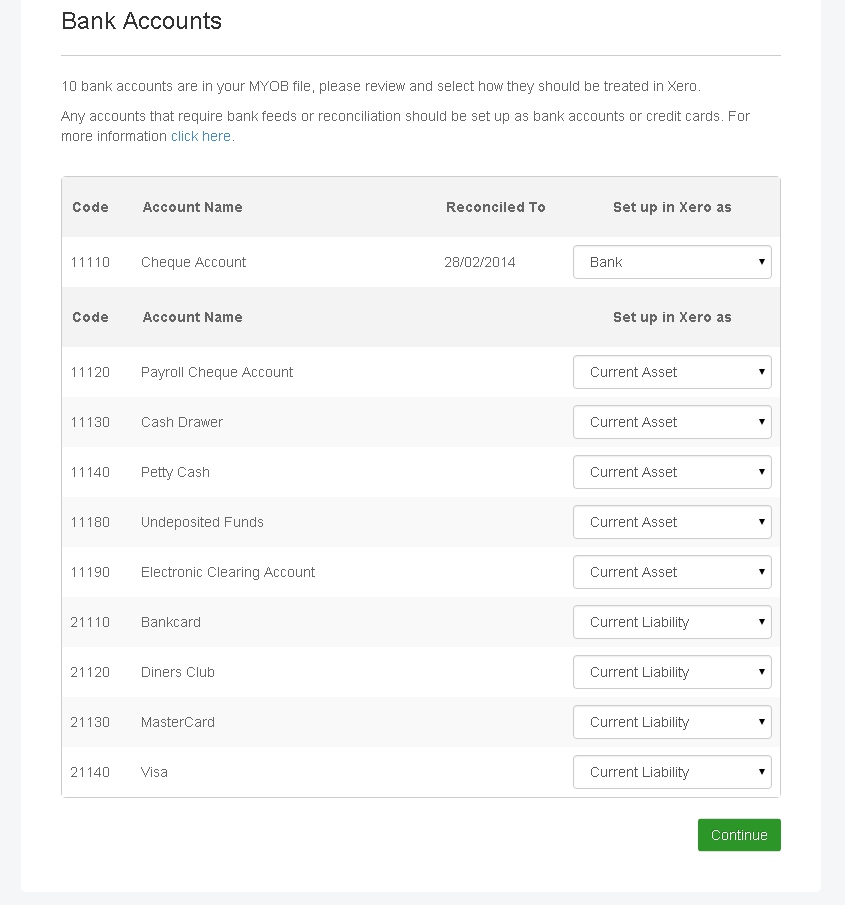
We recommend that any accounts that require bank feeds or reconciliation be set up as bank accounts or credit cards and all other accounts be changed to an asset or liability account. This is because you cannot create manual journals to bank accounts in Xero.
Select the bank map account types and then hit the green Continue button to get the conversion happening.
If you selected the ADVANCED PRACTICE package to map the Xero Chart of Accounts you will receive a separate email asking you to perform this step.
Otherwise from here we take up to three business days to complete the conversion though more often than not we will get it to you sooner.
4. Conversion (where it happens!)
From now on your conversion status page will show you where the conversion is at. It may take a day or two for Reckon files to get to this point.
IMPORTANT – Before you navigate away from the status page read EVERYTHING carefully and call us if you are unsure of any information displayed there.
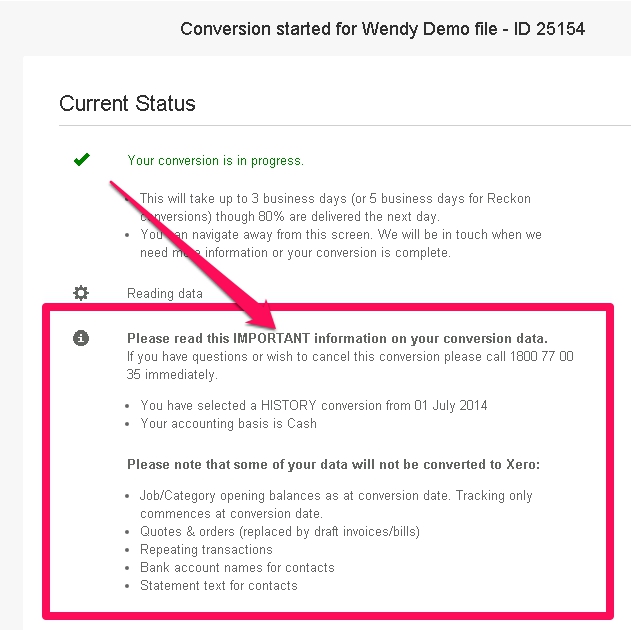
The conversion then progresses through a number of stages including data transfer into Xero, payroll set up (if applicable) and a conduct of checks and balances prior to completion to ensure the information has come across as expected. You can check in any time at your status page to see where you are at.
Otherwise just sit back and relax until you hear back from us.
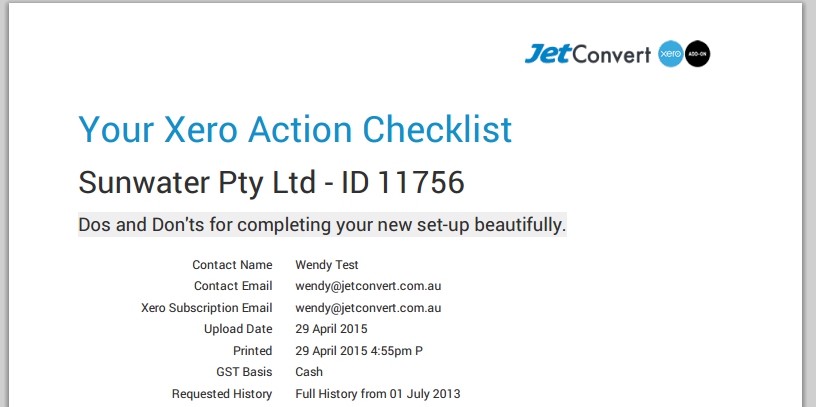
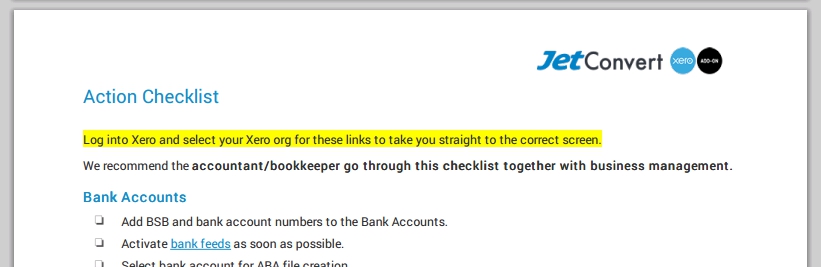
5. Receive the Xero subscription & post conversion Action Checklist
At the completion of the conversion you will receive an email with post conversion Action Checklist as a PDF. If you ordered a premium package we direct you to the status page to pay via Master or Visa card.
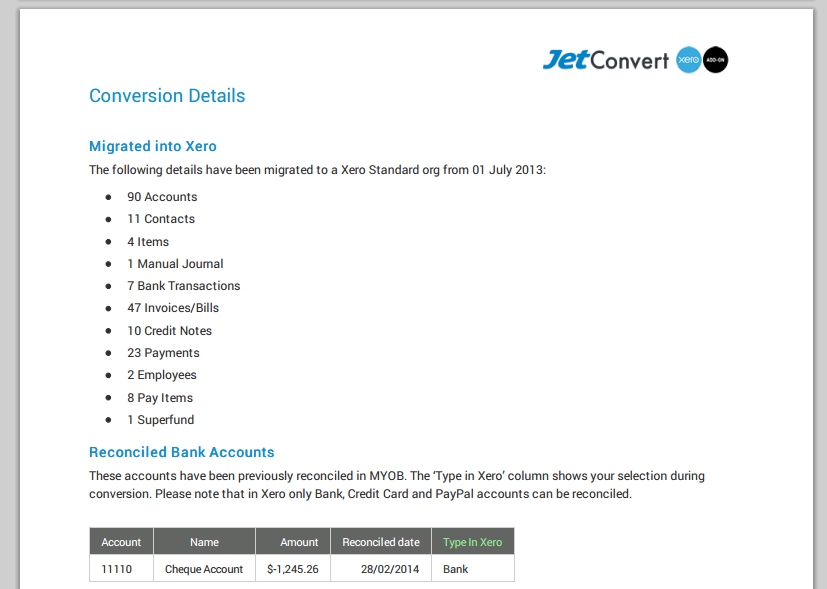
The Action Checklist gives you useful information on the data that came across and recommended next steps.
.
.
.
.
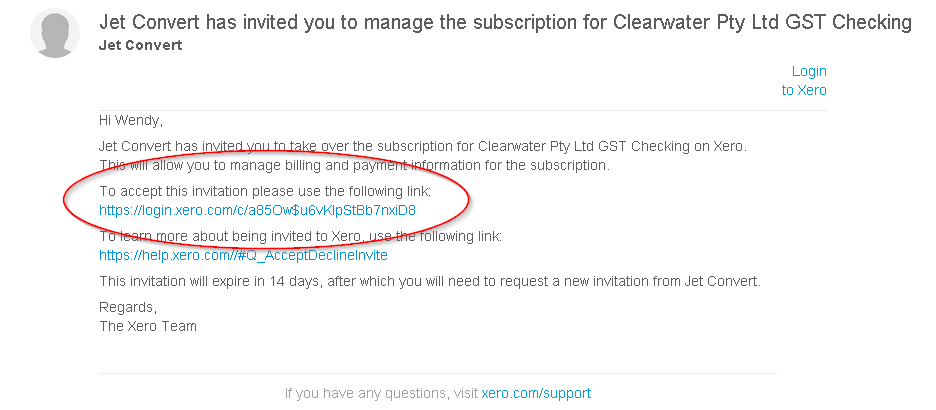
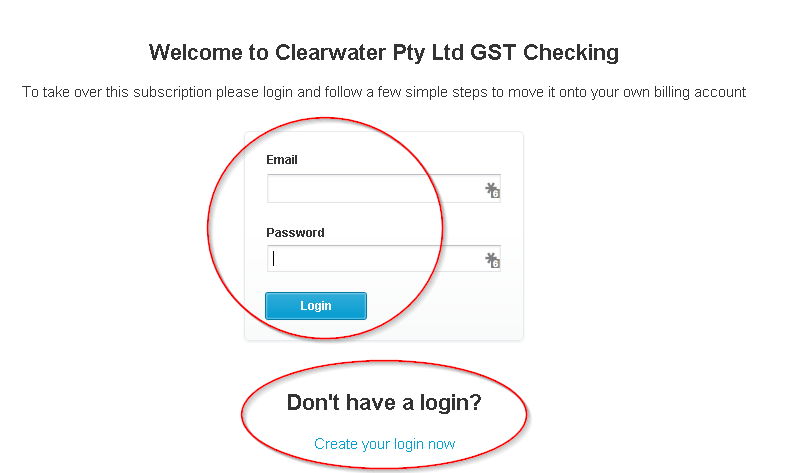
Following payment (if applicable) you are separately sent an email from @xero.com with a link to taking over your Xero subscription. Click on the link in this e-mail and then either login using your existing Xero username and password, or register with Xero if you have not done so before.
I hope this helps to give you an overview of what happens during a conversion. It may sound simple – and that’s because it is!
On our part, the team have spent many hours developing the software and creating rules to get the complex and time consuming grunt work done. Which leaves you to focus on what you do best, delivering value to your customers.
I’d love to hear from you with feedback or suggestions on our service – please comment below
Wendy